Wood is funny stuff. While it would seem easy to photograph, it is actually rather tricky. Wooden crafts are all over the map when it comes to contrast, tone and shape. In fact, the starting place to decide how to light a wooden object is to look at its shape and surface.
To make sense of the variety of wooden objects, let’s create a few general categories and describe how to photograph each:
1. Tall, thin objects (vases)
2. Squat, round objects (bowls and plates)
3. Squat, angular objects (boxes)
4. Miscellaneous objects (toys, etc.)
Remember that within each category there is a range of surface qualities ranging from flat to shiny.
The shape of an object defines how we will place the lights, and the surface characteristics tell us about the quality of light to use.
Let’s start with tall, thin objects. Tall pieces are easily lit with a single light placed over the object. I like to shoot these wooden objects with a softbox or umbrella over my main light.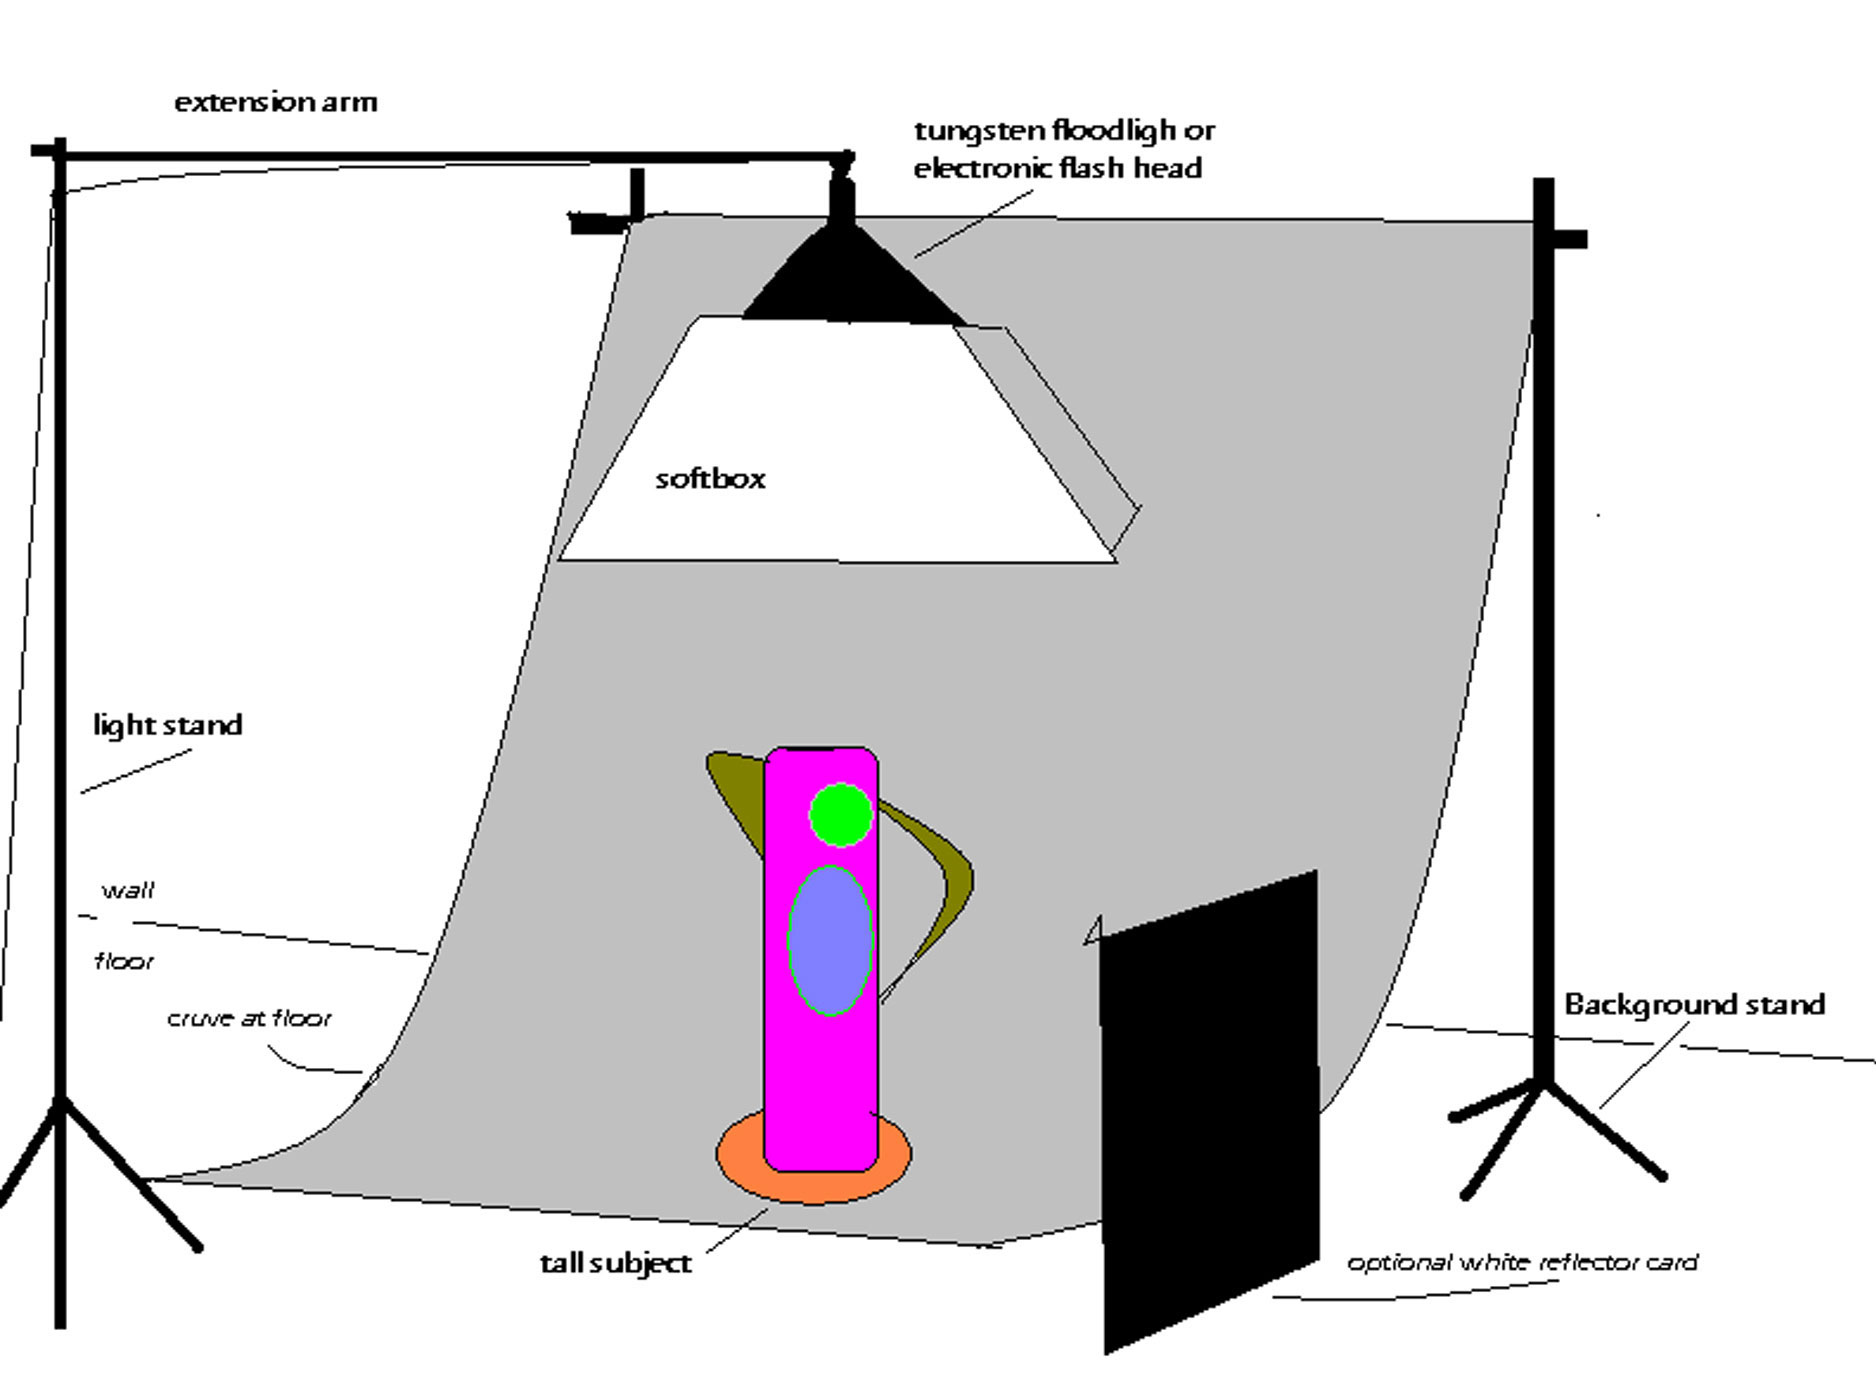 Although both devices soften the light, each creates some shadowing—important to emphasize texture. Photo umbrellas are just that—umbrellas—and generally are made of translucent white material that both reflects light and transmits some of the light through it. A softbox is a diffusing device that is placed over a light with a mounting bracket and softens the light as it passes through translucent white fabric.
For tall, thin objects like vases or sculptures, place the light over the object as shown at ____. The illustration shows the setup for a large piece sitting on the floor. The light in the softbox can either be on a stand or on a boom attached to a stand. For smaller pieces, you can set up the background on a tabletop and use the same lighting arrangement.
Suspend the softbox light above the subject at a distance two to three times the object’s height. That would be two to three feet over a one foot tall piece.
Squat (or even tallish) pieces present a problem for a single overhead light. That is, the undersides of the piece are in shadow and lose detail and color. There are several ways to fix this problem, the simplest being to move the overhead light back toward the camera and tilt the softbox toward the work. This will throw the light more uniformly on the top and bottom parts of the piece. Another simple approach is to place large white pasteboards on either side of the work to bounce light into the shadow areas (this method works best with pieces that have flatter surfaces).
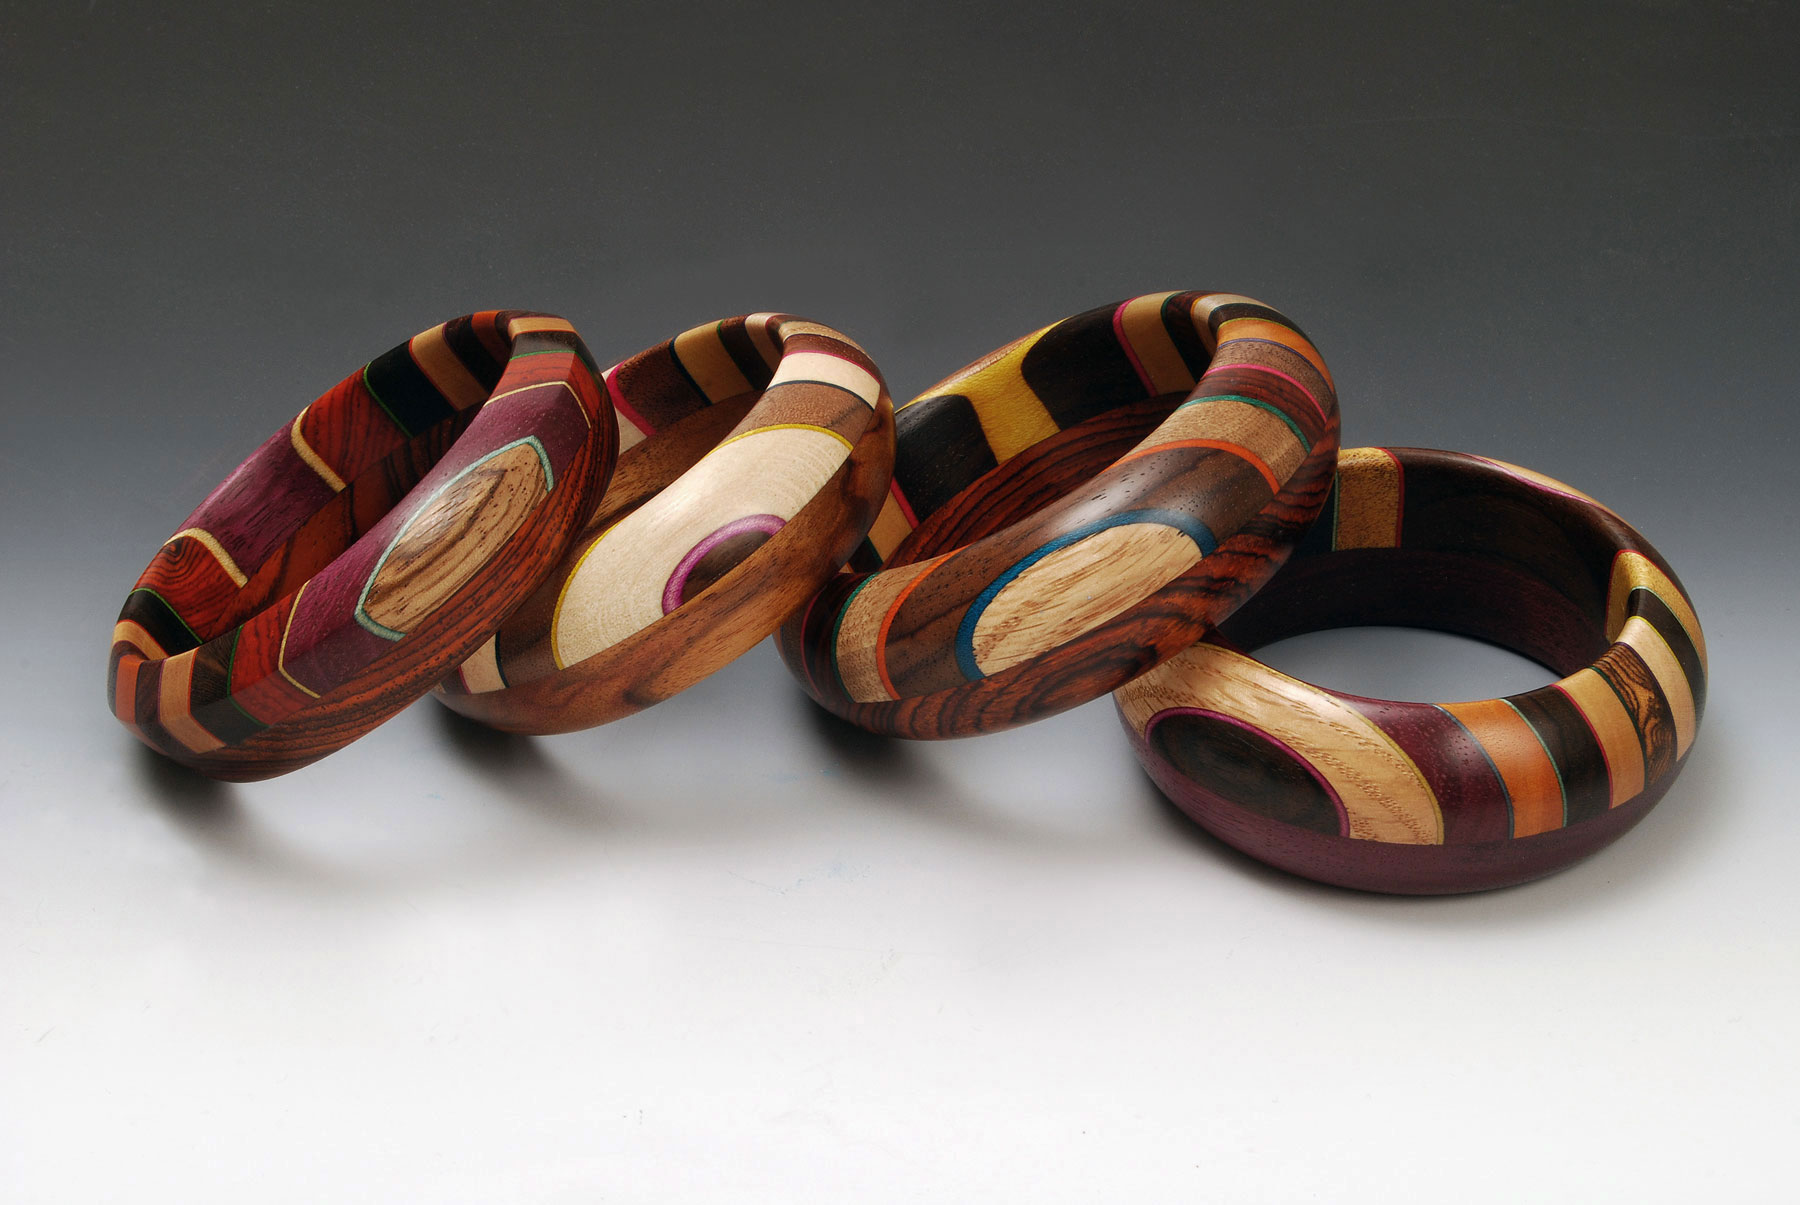 With squat pieces, though, I generally prefer to change the lighting arrangement. Instead of using a softbox, I switch to two lights bounced off of umbrellas. I place them on either side of the work and adjust them to fully illuminate the work.
As far as backgrounds go, a white or graduated background is generally a good way to bounce some light onto the lower portion of a work. However, when the underside of the piece is, for example, glossy dark wood, rather than lightening shadows, the background will reflect onto the work’s surface. This will wash out both the surface and the color. If this occurs with a graduated background, try reshooting with the object placed closer to the middle of the background on a light gray area.
Wooden boxes can be shot like other squat objects (even if the box is tall) with two lights and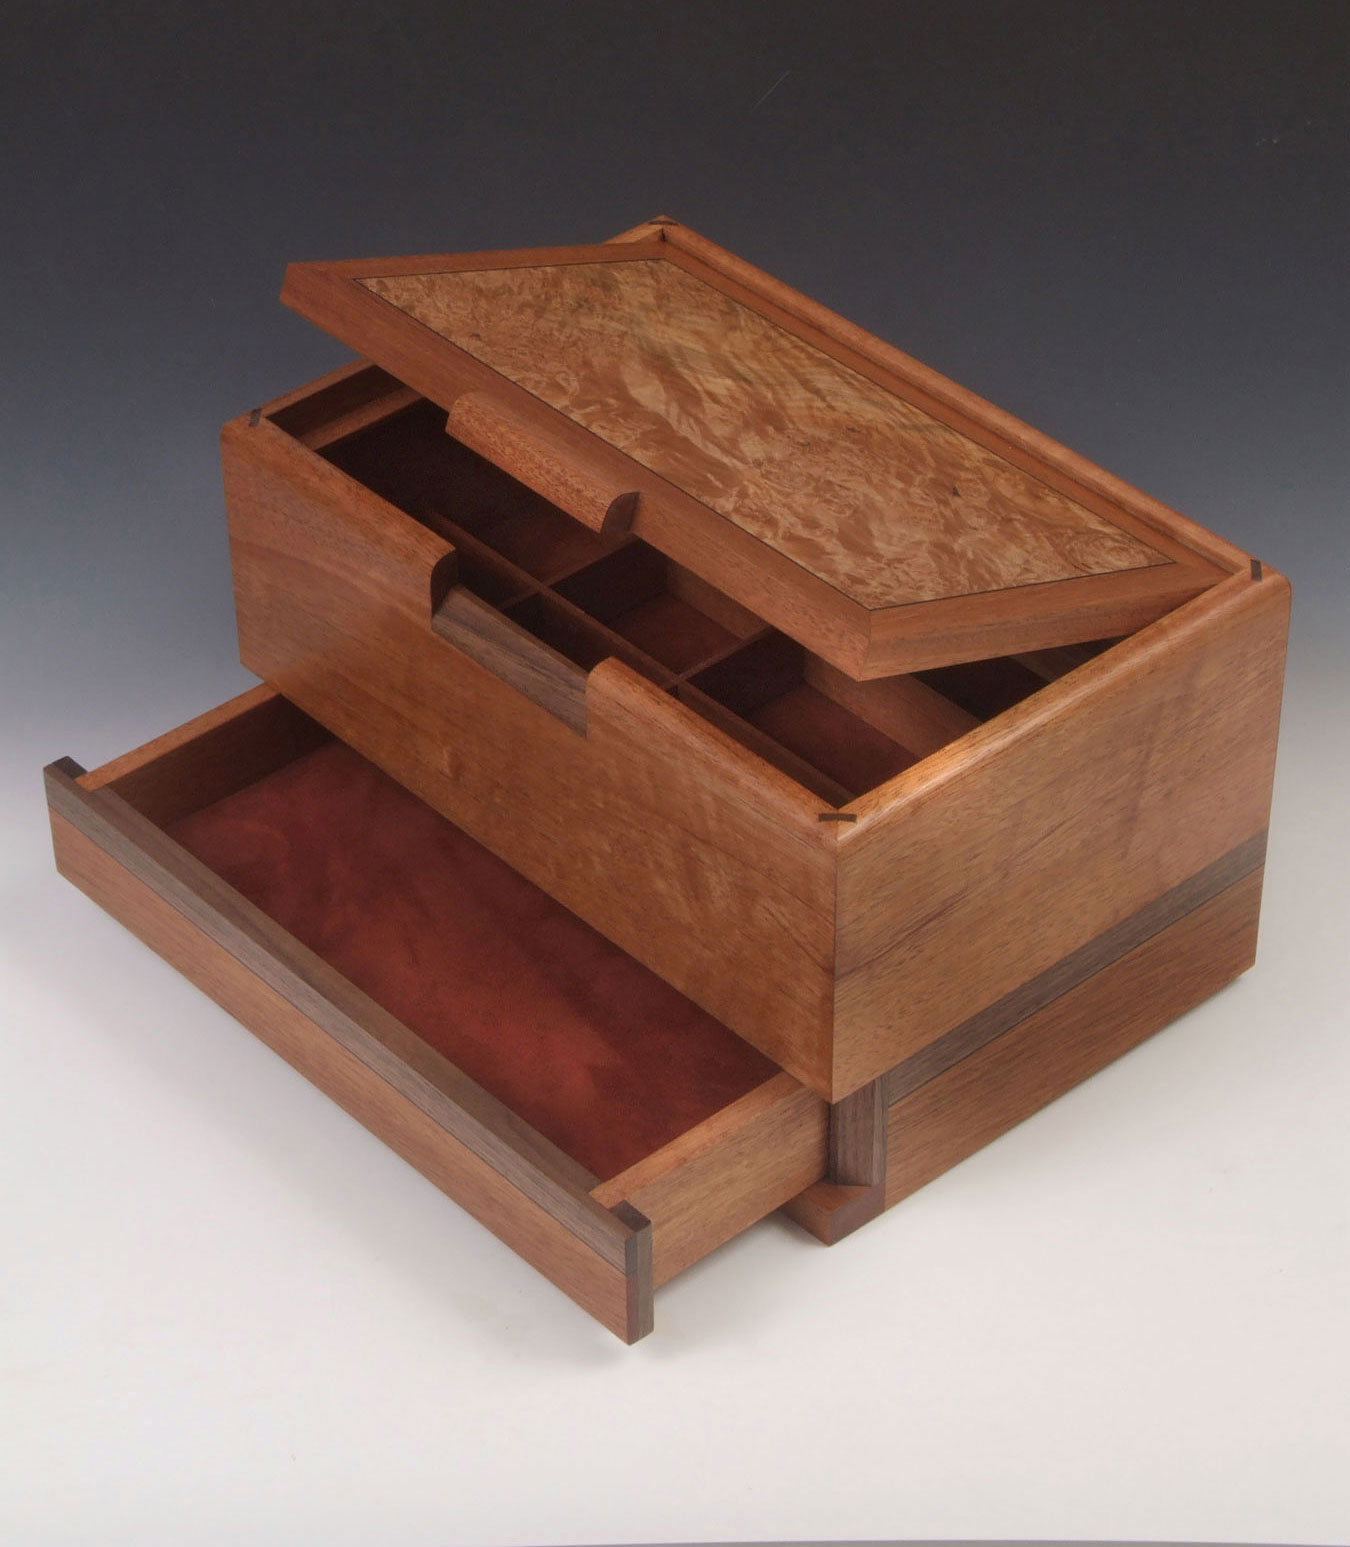 umbrellas. However, the positioning of the box is very important because boxes are generally four-sided and a photograph can only show two sides and the top. You have to decide what the most significant part of the box is and then arrange the box to clearly show it.
To start, place the box on the background with one corner pointing toward the camera (a three-quarter view). Next, if one side is more interesting than the other, rotate the box so that this side appears larger through the viewfinder. If the top of the box is its strength, raise or lower the camera position to find the best view.
This reminds me of a particular problem I’ve encountered when photographing boxes. With wonderfully crafted boxes, there is often no visual clue as to what they are. Yes, you can tell it’s a box, but you are left without any idea of how it opens or if there are any special features. For example, I once had to photograph a beautiful box whose drawers fit into the box so well that they were almost invisible when closed. In this situation, give the viewer clues about what they are seeing—open a drawer a little or lift the top a bit.
Also with boxes (or a wooden piece with incised areas), try moving the light stand on the right farther away from the piece. This will increase the depth of the shadows produced by the left light as well as emphasize texture. This unequal lighting is also the light arrangement to use when shooting toys, whirligigs and other three-dimensional pieces.
Another common problem when shooting highly polished word (especially dark tones) is glare. Dark, polished surfaces act like mirrors—reflecting the lights and producing hot spots on the piece’s surface. Unfortunately, there isn’t an easy solution to this problem. First, diffuse the light with umbrellas. If this doesn’t work, you may need to use a light tent. Softening the light makes it seem to come from a very broad area. A light tent creates a “box” of light with the sides of the tent being large, diffused light sources.
But, sometimes even a light tent may not be sufficient. In one extreme case, I put my midsize light tent inside of one of my very large light tents—this double diffusion did the job. The downside was that the light was not only softened, but also reduced in intensity. The two-tent method cost six f/stops of light, which meant that instead of shooting at f/16 at 1/8th second, I ended up at an exposure time of 4 seconds.
As always, all of these methods need to be seen as starting points. Every wooden object is different and each calls for lighting that is specific to that piece. Experiment as you go. Move lights around and watch the effect of these changes. Over time, you’ll improve your photos and your skills.